

Key takeaways
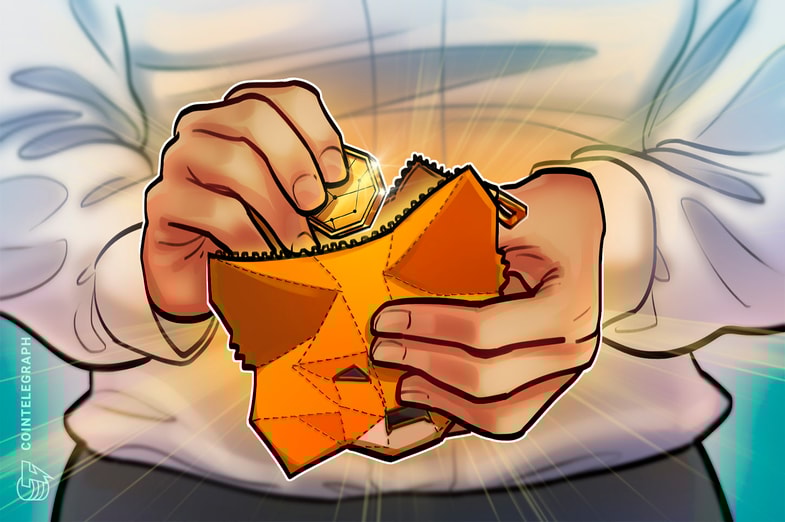
MetaMask is a free digital wallet designed specifically for managing Ether (ETH) and Ethereum-based tokens, functioning as a bridge to the Ethereum blockchain.
MetaMask allows you to buy, send, receive and swap cryptocurrencies and NFTs and supports adding custom networks beyond Ethereum.
Every transaction in MetaMask requires paying a gas fee with a layer-1 coin, which is necessary for processing transactions on the Ethereum network.
For added security, MetaMask users should lock their wallets when not in use, be cautious of phishing attacks, and consider using a hardware wallet.
Digital wallets like MetaMask hold your money, but instead of traditional fiat money like dollars or euros, they hold cryptocurrency. Just like you can use a wallet to carry your cash, you can use MetaMask, a free digital wallet, to store and manage your digital currency.
MetaMask is primarily used to connect to the Ethereum blockchain, acting as a bridge between you and the Ethereum network. Think of the Ethereum blockchain as a big digital bank that records cryptocurrency transactions and MetaMask as your personal bank account that records your personal transactions.
With MetaMask, you can store, send, receive and convert Ether (ETH) and Ethereum-based tokens, such as USD Coin (USDC), Chainlink (LINK) and Tether (USDT). You can also connect to some other blockchain networks, as will be explained later.
Ethereum has unique rules and technology that MetaMask natively supports, while other blockchains or digital networks have their own rules and technologies that MetaMask may not be compatible with.
Step-by-step guide to setting up MetaMask
Whether you’re a complete beginner in crypto or a seasoned pro looking to stash your hard-earned tokens, this MetaMask wallet guide will walk you through the setup process with ease.
Step 1: Download MetaMask
MetaMask is a free tool you can add to web browsers like Chrome, Firefox, Brave and Edge, or download as an app on iOS and Android.
To install the MetaMask browser extension, go to the official MetaMask website, click “Download” in the menu bar, and follow the installation instructions to add the MetaMask extension.
To install MetaMask on your phone, go to your device’s App Store or Play Store and hit “Get” or “Install.”

Step 2: How to setup MetaMask wallet
To set up a MetaMask account:
Open MetaMask and click on “Get Started.”
You’ll be prompted to create a new wallet, or you can import your existing MetaMask wallet from another device.
If you’re creating a new wallet, choose a strong password to protect it.
Copy and confirm that you safely stored the 12-word seed phrase that MetaMask provides you with.
It’s important to keep the seed phrase somewhere safe. This phrase is essential for recovering your wallet if you forget your password or need to restore it on a different device.
Step 3: Add crypto to MetaMask wallet
MetaMask provides options to buy cryptocurrency directly through the app using payment methods like credit/debit cards or bank transfers. You can also import an existing wallet that contains crypto and transfer it from within the app, or transfer crypto from another wallet into your MetaMask wallet.
Buy crypto
To buy crypto with MetaMask, click “Buy” in the menu section and select token and network from the list of options. Enter the amount and select the currency you want to exchange for crypto.
The buying options will depend on the country and state in which you live. Click “Debit or Credit” to see the complete list of available payment methods. Select the most suitable one for you in terms of wait time, exchange rate, fee amount and simplicity.
How to add another wallet to your MetaMask account
If you already have cryptocurrency in another wallet, you can import that wallet into your MetaMask wallet and transfer it between wallets from within the app.
In the browser extension’s Dashboard section, click “+” and select the other wallet you want to transfer from. After the wallet is connected, your wallet’s assets will be shown in your portfolio. You can toggle between various wallets in the dashboard section.
In the mobile app’s portfolio section, click “Account” and then “Add account or hardware wallet.” You can import your account by pasting your private key or connecting your wallet to MetaMask through Bluetooth.
Transfer crypto from another wallet
To transfer crypto from another wallet to your MetsaMask account, copy your MetaMask public address from the mobile app or extension.
Then, go to your existing wallet or crypto exchange account to send funds to the MetaMask wallet address.
Step 4: Manage crypto in MetaMask
Once you have crypto in your MetaMask wallet, you can view your balance directly in the app.
If you hold tokens that aren’t automatically displayed in MetaMask, you can add them manually. Click “Import tokens” and enter the token’s contract address and other details.
Did you know? MetaMask also has a swap feature that enables users to exchange one token for another within the wallet without using a centralized exchange platform. To swap your tokens, simply go to the “Swap” section and convert the tokens.
How to withdraw money from MetaMask
There are two main ways to withdraw your funds from MetaMask.
Option 1: Sell crypto for fiat directly in MetaMask
If you have crypto in your MetaMask wallet but need to withdraw fiat money like dollars or euros, you can sell your crypto directly in the app.
To do so, enter the amount of crypto you want to sell in the “Sell” section, and MetaMask will show you quotes from different providers.
These quotes are updated in real time to reflect the latest rates. If your region is supported, you can easily make the transaction. If not, you can transfer your crypto to an exchange to sell it for fiat.
Option 2: Transfer crypto to another wallet or exchange
To transfer crypto to another wallet or an exchange, follow this MetaMask tutorial:
Step 1: Locate the deposit address for exchange or second wallet
Log in to or sign up for a crypto exchange or another wallet, find the “Deposit” section, and copy the deposit address for the cryptocurrency you want to transfer.
Step 2: Send crypto from MetaMask
Open MetaMask and click on the “Send” section. Paste the deposit address into the recipient field, and make sure you have enough ETH for gas fees. Enter the amount and confirm the transaction.
Did you know? Despite boasting over 30 million active monthly users, MetaMask does not support Bitcoin (BTC), the largest cryptocurrency by market capitalization.
How to secure a MetaMask wallet
Just like your physical wallet, your MetaMask must be protected to keep your money safe. Here are simple steps to help you secure your MetaMask wallet:
Tip 1: Lock MetaMask wallet when not in use
If you’re not using MetaMask, make sure to lock your wallet. You can do this by clicking the “Lock” option in the MetaMask mobile app or browser extension.
It’s also possible to set a lockout timer for a specific number of minutes, after which the wallet will be automatically locked.
Tip 2: Watch out for phishing attacks
Phishing happens when scammers pretend to be MetaMask or another trusted source to steal your information.
Always be cautious of emails, messages or websites, as they may attempt to trick you into revealing your secret recovery phrase or password.

Tip 3: Use a hardware wallet
If you have a lot of crypto, consider using a hardware wallet like Ledger or Trezor. These physical devices store your crypto offline, making it much harder for hackers to steal your funds.
MetaMask connects with several hardware wallets, and this video highlights picks in 2025 that keep your keys safe offline while staying easy to use in the browser.
Did you know? MetaMask transactions require a “gas fee,” paid with a layer-1 coin like Ether (ETH) on the Ethereum network. Without this coin, you can’t send, swap or sell crypto.
How to use MetaMask with other networks
MetaMask isn’t limited to just Ethereum! You can also connect it to Ethereum Virtual Machine-compatible networks like BNB Chain and Polygon. These networks have their own coins and fees, but they can be added to MetaMask just like Ethereum.
Option 1: Add a popular network to MetaMask
To connect your MetaMask wallet to another popular network, open your MetaMask wallet, click on the network dropdown menu that says “Ethereum Main Network” by default, choose the network, and click “Confirm” and “Switch to Network.”
Option 2: Add a custom network to MetaMask
To add a custom network to MetaMask, open the “Networks” section and click the “Custom networks” option.
You will need to enter details about the network you want to connect to, such as its name, RPC URL, and chain ID. You can find these details on the network’s official website or by searching online.
After you’ve added the network, it will appear in the list, and you can switch between networks at any time.

Is MetaMask right for you?
MetaMask can be a great choice for exploring crypto and using Ethereum-based apps. It’s handy for buying, selling and swapping crypto and non-fungible tokens (NFTs) and connects easily with various Ethereum apps and games.
However, if you’re new to crypto and prefer a simpler, more guided approach, a crypto exchange might be better for you. Exchanges can offer a user-friendly experience, customer support and relatively low fees.
For example, Binance charges a transaction fee of around 0.1%, and Coinbase’s fees range from 0.05% to 0.6%. MetaMask’s transaction fee is 0.875%, plus there are network gas fees, which vary based on network congestion.
From the security side, MetaMask is more secure than most exchange wallets since you control your private keys. However, for the strongest security, especially when holding large amounts, a hardware wallet is safest because it stores its keys offline.